
Waterworks & Plantcare FAQ
The watering set keeping your plants happy
Everything you were wondering about when it comes to olla-inspired watering set Waterworks.
Got a valid question that's not on here?
Get in touch and we'll not only respond and add it to the list, but also award you with a €5,- discount on your next House of Thol order!
Frequently Asked Questions
About Waterworks
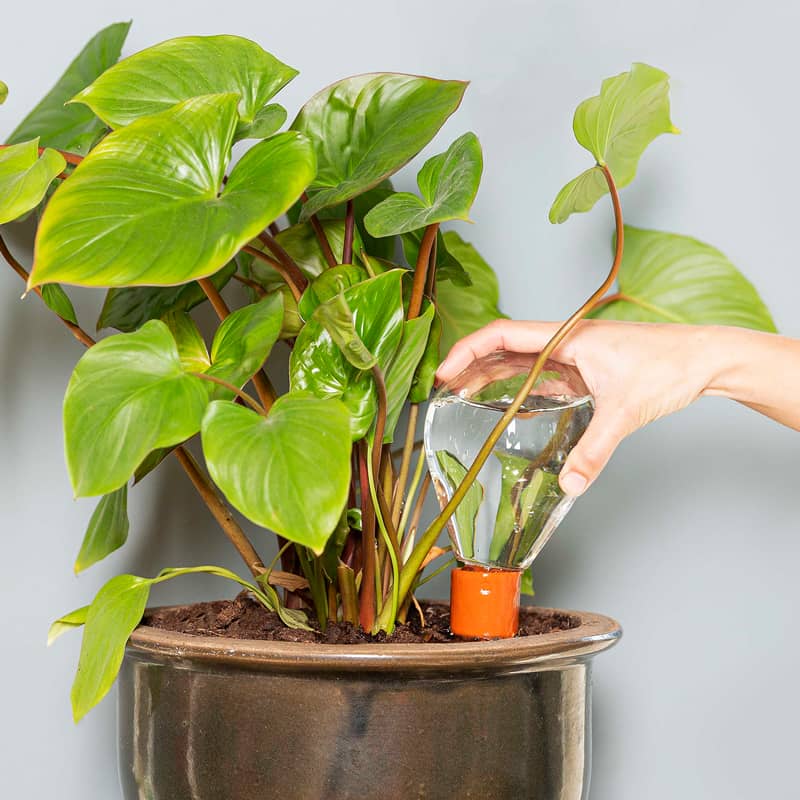
How does Waterworks work?
Plants extract moisture from the soil through their roots. Water in the soil is absorbed by the root hairs of the plant, which then transports the water up through the stem and into the leaves. This process is driven by a combination of factors including transpiration, the loss of water from the leaves, and the pressure gradient created by the movement of water from the soil to the leaves.
Waterworks can help balance the intake of water by providing a consistent source of moisture to the plant roots.
The porous material of the cone slowly releases water into the surrounding soil, providing a constant supply of moisture to the plant.
The use of Waterworks can help reduce water loss due to evaporation and minimize the need for frequent watering, making it a more sustainable and efficient method of irrigation.
What is capillary action?
Capillary action is the process by which a liquid, such as water, moves through a narrow space, such as a thin tube or a porous material, due to the combination of adhesive and cohesive forces. Adhesive forces are the attractive forces between different substances, such as water and a solid surface, while cohesive forces are the attractive forces between molecules of the same substance, such as water molecules.
When a narrow tube or a porous material is placed in contact with a liquid, such as water, the adhesive forces between the liquid and the surface of the tube or material pull the liquid upward. At the same time, the cohesive forces between the molecules of the liquid pull the liquid upward as well. These combined forces result in the upward movement of the liquid through the narrow space, against the force of gravity.
In plants, capillary action plays a vital role in the movement of water and nutrients from the roots to the leaves. The tiny capillaries in the root system allow water to move upward against the force of gravity, reaching the leaves and providing essential nutrients to the plant. This process is also known as transpiration.
What is an olla and when was it used?
An olla is an unglazed, porous clay jar that is traditionally used for irrigation purposes.
It has been used for thousands of years, particularly in arid regions, to water plants by burying the jar in the soil near the plants' roots. The porous walls of the jar allow water to seep slowly into the soil, providing a slow and steady supply of water to the plants.
This method of irrigation is also known as "ollas irrigation" and has been used in various parts of the world, including North Africa, the Middle East, and the Americas.
The use of ollas dates back to ancient times and has been documented as far back as 4,000 years ago in China.
Where can I buy Waterworks?
Well, here in the webshop, for starters.
If you prefer to pick up a set somewhere near you, check out our store locator to see where to find House of Thol points-of-sale.
Every now and then we take part in an exhibition or fair and are likely to bring the Waterworks-sets with us.
Check out our Calendar to see what we have coming up.
Where is Waterworks made?
Waterworks sets consist of several parts that all come from different suppliers. We aim to source the parts from within Europe when we can.
-The cardboard boxes are made in the Netherlands.
-The terracotta cones are currently being made by Thomas at the House of Thol workshop.
-The glass reservoirs are currently produced in Beijing (same as for the Patella), but we are looking to transfer that production into Europe when we can.
All parts are collected and packaged at the House of Thol headquarters in Overasselt.
What if I break or lose a part?
We all know things like that can happen. And personally hate it when that means we have to buy a whole new set.
That is why it is possible to re-order both the glass reservoir as well as the terracotta cones separately.
How long does it take to ship Waterworks?
When you place an order in our webshop, our goal is to always have it out the door within 48 hours.
Orders placed on Friday and in the Weekends are dropped off at the post office the following Monday.
To give you an idea about the way we manage your webshop order: we usually start out our day with preparing the orders from the day before and add the orders coming in before lunch. Orders placed after 13:00 are usually sent out the next day.
Find more information about shipment and expected delivery times here.
How do i know which cone to choose?
A plants' demand for water varies depending on the size and type of plant as well as the current season.
Make sure to choose the appropriate cone for your plant:
- Small: more glaze, smaller porous surface / for plants that don't need a lot of water like e.g. succulents.
- Medium / for most plants
- Large: less glaze, larger porous surface / for thirsty (or) larger (leaved) plants.
How often do I need the fill the reservoir?
That depends!
The variety and size of the plant, the current season, and the plant's location can all contribute to a faster or slower intake of water.
The main rule is to just keep an eye on the reservoir and refill when empty.
Waterworks is a helpful tool, but every plant and situation is different, so keep monitoring your plant to make sure it is happy.
How long can i go on a Holiday for?
That depends!
The variety and size of the plant, the current season, and the plant's location can all contribute to a faster or slower intake of water.
Rule of thumb is that the reservoir lasts about 7-10 days with a medium cone, 5-7 days with a large cone, and 12-18 days with a small cone.
Bear in mind that large plants will probably not be too happy with a small cone.
Do you have to immediately refill the reservoir when it runs empty?
It is important to ensure that the terracotta cone remains hydrated at all times so as not to break the connection it has with the surrounding soil.
That said, even when the reservoir is empty, the cone still has some water in it, so you'll usually feel called to refill the bulb before the water really runs out.
Why do I need to soak the cone in water before placing it in the soil?
Great question!
It's not actually an absolute must, but since the natural system works by passing on its moisture level to the surrounding soil, the sooner there is a 'moisture-connection' between the soil and the cone, the better.
We noticed that if the soil is too dry, it can be difficult to start up that connection and get the system going, hence the advice to moisten the cone before placing it in the soil.
Can I use the cones without the reservoir?
Yes! You definitely can!
You can use it without any kind of reservoir, it's just difficult to spot when the water is running out + you need to refill regularly.
The top diameter of the cone also makes it possible to hack with most kinds of bottles.
Two things:
1. First make sure the bottles are cleaned and there is definitely no alcohol remaining, as that would effectively poison your plant;
2. and secondly use smaller (beer)bottles rather than larger (wine)bottles, as these can be too heavy and topple over.
Is it possible to use a plastic bottle with the terracotta cone?
Well, yeah, technically you can.
Any container with a neck that fits the terracotta cone can be used as a water reservoir.
That said: part of the reason we designed Waterworks, was because we wanted to create something stylish and high-quality, a pretty beneficial gem to be added to your beloved houseplants.
But i guess you can use plastic if you feel lik it. Yeah.
Why do you advice against placing the Waterworks set in direct sunlight?
It's not recommended to place a reservoir filled with water in direct sunlight because it can lead to a phenomenon called "glass fire."
When sunlight passes through the water-filled glass, it can create a magnifying effect that concentrates the light into a small area, which can generate a lot of heat.
If the reservoir is placed near flammable materials, the intense heat can cause a fire.
Additionally, the concentrated heat can cause the glass to crack or break due to thermal shock, which can be dangerous if you are nearby.
Therefore, it's best to avoid placing your Waterworks set in direct sunlight to prevent the risk of fire or damage to the glass.
Can I use Waterworks with any plant?
Most plants are quite happy with a constant gradual supply of water, especially plants that naturally grow in forests and jungles or close to the waters' edge.
That said, there are also plants that prefer to have their roots dry out every once-in-a-while, and we would not advice using Waterworks for those.
Waterworks is a helpful tool, but every plant and situation is different, so keep monitoring your plant to make sure it is happy.
Should I use a special plant pot for Waterworks?
You can easily place Waterworks in the soil near your plants and in any pot you like.
No need to re-pot!
(Unless there is not enough soil to place the cone, but that means it is about time to re-pot your plant anyway).
We do advice using terracotta or other ceramic pots with a drainage hole, but that is a general tip that goes for plants whether you use Waterworks or not.
Don't use plastic please, and there are plenty of beautiful plant pots to be found in your local thriftstore.
Waterworks is a helpful tool, but every plant and situation is different, so keep monitoring your plant to make sure it is happy.
Do I need to re-pot my plant before using Waterworks?
You can easily place Waterworks in the soil near your plants and in any pot you like.
No need to re-pot!
(Unless there is not enough soil to place the cone, but that means it is about time to re-pot your plant anyway).
Waterworks is a helpful tool, but every plant and situation is different, so keep monitoring your plant to make sure it is happy.
How often do I need to clean my Waterworks set?
We only clean our Waterworks-sets when the glass starts to stain, so not too often.
To clean the glass reservoir, use dish soap or a solution of water and vinegar and swirl inside the reservoir. Then, use a bottle brush to scrub the inside.
Avoid using abrasive cleaners, as these can scratch and damage the glass.
For tough stains or build-up, a solution of baking soda and water can be used. Be sure to rinse the glass with fresh water after cleaning.
To clean the terracotta cones, use a soft-bristled brush or sponge and mild soap and water. Avoid using abrasive cleaners or scrubbers and rinse thoroughly with clean water.
For more easy care-tips and advice on getting rid of scale, check out our Care Guide
How should I care for my Waterworks-set?
To clean the glass reservoir, use dish soap or a solution of water and vinegar and swirl inside the reservoir. Then, use a bottle brush to scrub the inside.
Avoid using abrasive cleaners, as these can scratch and damage the glass.
For tough stains or build-up, a solution of baking soda and water can be used. Be sure to rinse the glass with fresh water after cleaning.
To clean the terracotta cones, use a soft-bristled brush or sponge and mild soap and water. Avoid using abrasive cleaners or scrubbers and rinse thoroughly with clean water.
For more easy care-tips and advice on getting rid of scale, check out our Care Guide
Will the color of the terracotta cone fade?
Yes, the color of terracotta can fade over time due to exposure to sunlight, water, and other environmental factors.
With prolonged exposure to sunlight, terracotta can lighten and become less vibrant in color. However, some people actually prefer the weathered and aged look of faded terracotta as it can add character and charm to the piece.
To minimize fading, it's recommended to keep terracotta away from direct sunlight and to avoid using harsh chemicals during cleaning.
Wait... Didn't Waterworks come with a cork before?
Yes! You're absolutely right, you early adapter you!
When we first launched Waterworks in 2013/2014, the reservoir had a cork stopper.
We decided on the stopper because it would make it easier to clean the reservoir.
And it did.
However, we noticed that cleaning the reservoir isn't actually that hard, and isn't something that's done very often.
Instead, whenever the cork was not an airtight fit, the reservoir would leak air, effectively breaking the vacuum that was keeping the water in place and causing Waterworks-sets to drain too fast.
We got a lot of questions about that.
A lot.
Also, an extra material meant extra resources and a lot of extra work during packing and handling.
That's why, in the spring of 2020, we relaunched Waterworks with an enhanced design and a new (lower) price, ready to take over the world!
Can Waterworks be used as a business gift?
Yes, definitely!
Waterworks makes a great eco-conscious business gift!
In fact, depending on the numbers, we can even look into a custom series and/or customize the packaging to fit your organization.
Get in touch with Jana to learn about the possibilities.
Can i sell Waterworks in my shop?
Yes, you can!
Read all about it here
Frequently Asked Questions
About Plantcare in general
What are the benefits of houseplants?
Houseplants aren't just for looks. Research shows they improve indoor air quality, boost your mood, improve productivity and help you heal faster.
We'd love to tell you more about this. so Here is a page dedicated to the science-backed reasons to incorporate houseplants in your home or office decor.
what is the most sustainable choice when it comes to houseplants?
When it comes to sustainability and houseplants, there are a few things to consider. Here are some tips for making sustainable choices:
- Choose native or locally grown plants: Plants that are native to your region or grown locally will be adapted to your climate and will require less resources to grow and transport.
- Choose plants that don't require a lot of maintenance: Plants that require frequent watering or special care can be more resource-intensive. Look for plants that are easy to care for and don't require a lot of extra attention.
- Choose plants that are propagated sustainably: Some plants are propagated by taking cuttings or dividing the plant, which is a more sustainable method than growing plants from seed or buying mature plants.
- Avoid plants that are over-harvested: Some popular houseplants, such as certain types of ferns or succulents, are over-harvested in the wild. Look for alternative species that are not over-harvested or choose plants that are sustainably grown in nurseries.
- Use sustainable pots and containers: Choose pots made from sustainable materials, such as terracotta or stoneware, and preferably use ones you already have or find them in a thriftstore.
By choosing sustainable houseplants and caring for them properly, you can create a beautiful and eco-friendly indoor garden.
Why is my plant getting yellow leaves?
Yellow leaves on a plant can be a sign of several different issues. Here are some common reasons why plants develop yellow leaves and what you can do about it:
- Overwatering: If you've been giving your plant too much water, the soil may become waterlogged and the roots may start to rot. This can lead to yellowing of the leaves. To remedy this, allow the soil to dry out completely before watering again and make sure the pot has adequate drainage.
- Underwatering: Conversely, if you haven't been watering your plant enough, the leaves may start to turn yellow and dry out. To fix this, make sure you're watering your plant regularly and that the soil is moist but not waterlogged.
- Nutrient deficiency: If your plant isn't getting enough nutrients, the leaves may start to turn yellow. This can be remedied by fertilizing your plant with a balanced fertilizer or adding compost to the soil.
- Pests or disease: Certain pests, such as spider mites or mealybugs, can cause yellowing of leaves. Similarly, fungal diseases can also cause leaves to turn yellow. If you suspect pests or disease, isolate the plant and treat it with appropriate insecticides or fungicides.
- Natural aging: In some cases, yellowing leaves may simply be a sign of natural aging. As leaves age, they may turn yellow and eventually fall off the plant. This is normal and nothing to be concerned about.
It's important to identify the specific cause of yellowing leaves in order to effectively address the issue. By addressing the underlying problem, you can help your plant to recover and thrive.
Why does my plant get brown leaf-tips?
Brown leaf tips on a plant can be caused by several factors. Here are some common reasons why plants develop brown leaf tips and what you can do about it:
- Dry air: If the air in your home or office is too dry, your plant may develop brown leaf tips. To remedy this, consider using a humidifier or placing a tray of water near the plant to increase humidity.
- Over-fertilization: If you've been over-fertilizing your plant, it may develop brown leaf tips. This is because too much fertilizer can cause salt buildup in the soil, which can damage the roots and lead to brown leaves. To fix this, stop fertilizing your plant for a while and flush the soil with water to remove excess salts.
- Under-watering: If you haven't been watering your plant enough, the leaves may start to dry out and turn brown at the tips. Make sure you're watering your plant regularly and that the soil is moist but not waterlogged.
- Over-watering: On the other hand, if you've been giving your plant too much water, the soil may become waterlogged and the roots may start to rot. This can also lead to brown leaf tips. Make sure the pot has adequate drainage and allow the soil to dry out completely before watering again.
- Exposure to chemicals: Exposure to chemicals, such as chlorine in tap water or air fresheners, can also cause brown leaf tips. To avoid this, use filtered water and avoid placing your plant near sources of chemicals.
It's important to identify the specific cause of brown leaf tips in order to effectively address the issue. By addressing the underlying problem, you can help your plant to recover and thrive.
How often should I water my plant?
The frequency of watering your plant depends on several factors, such as the type of plant, the size of the pot, the type of soil, the humidity level, and the amount of light it receives.
As a general rule of thumb, you should wait until the top inch of soil feels dry to the touch before watering again.
Waterworks keeps the soil near the roots moist without water-logging it, which is ideal for most plants.
Remember, each plant is unique and may have different watering needs, so it's important to pay attention to your plant's individual needs.
What should I do if my plants start to wilt or droop?
Wilting or drooping is a common problem in plants, and it can be caused by a variety of factors. Here are some steps you can take to address the issue:
- Check the soil moisture: Overwatering or underwatering can cause plants to wilt or droop. Check the soil moisture level with a moisture meter or by sticking your finger in the soil. If it feels dry, water the plant, and if it feels wet, wait for the soil to dry out before watering again.
- Check for root rot: If the soil becomes water logged, it can lead to root rot. Check the roots for signs of rot, such as a foul odor or soft, mushy texture. If root rot is detected, the affected roots should be pruned, and the plant should be repotted in fresh soil.
- Check for pests: Pests such as spider mites, aphids, and mealybugs can cause plants to wilt or droop. Inspect the plant and its leaves for signs of pests, such as webs or sticky residue. If pests are detected, isolate the affected plant and treat it with an appropriate pesticide.
- Adjust the temperature and humidity: Extreme temperatures and low humidity can cause plants to wilt or droop. Make sure the plant is in a suitable environment with moderate temperatures and humidity levels.
- Provide proper lighting: Plants require appropriate lighting for healthy growth. Ensure the plant is receiving the right amount and type of light for its species.
- Provide adequate nutrients: Plants require proper nutrients for healthy growth. Make sure the plant is receiving adequate nutrients through regular fertilization and using the appropriate soil for its species.
What is the best type of soil to use for my houseplants?
The best type of soil for houseplants depends on the specific needs of the plant. However, a good general-purpose soil mix for most houseplants is a well-draining soil that provides good aeration, water retention, and nutrient content.
Don't use peat moss, which is often harvested from ecologically sensitive peat bogs.
Coconut coir, is a sustainable alternative that provides similar benefits with less environmental impact.
You can also create your own compost mix or source your soil locally.
How often should i fertilize my plants?
The frequency of fertilizing your plants depends on several factors, such as the type of plant, the age of the plant, the type of soil, and the time of year.
In general, most houseplants benefit from regular fertilization during their growing season, which is typically in the spring and summer months. Here are some general guidelines for fertilizing your plants:
- Choose the right fertilizer: Select a fertilizer that is appropriate for the specific needs of your plant. There are many different types of fertilizers, such as liquid, granular, and slow-release, so it's important to choose one that is appropriate for your plant's needs.
- Follow instructions: Read and follow the instructions on the fertilizer package carefully. Over-fertilizing can be harmful to your plant, so it's important to use the correct amount of fertilizer.
- Dilute liquid fertilizer: If using a liquid fertilizer, dilute it with water to prevent burning the plant's roots.
- Reduce fertilizing in the winter: Most houseplants go through a dormant period in the winter, so they don't need as much fertilizer during this time.
- Monitor for signs of over-fertilization: Watch for signs that your plant is being over-fertilized, such as brown tips on the leaves or a build-up of fertilizer salts on the soil surface.
In general, it's best to err on the side of under-fertilizing rather than over-fertilizing.
If in doubt, it's always a good idea to do some research on the specific needs of your plant or consult with a local nursery or gardening expert.
What kind of light do my plants need?
Different plants have different light requirements, but in general, most houseplants thrive in bright, indirect light. This means they should be placed near a window but not in direct sunlight, which can scorch their leaves.
Some plants, such as succulents and cacti, prefer direct sunlight, while others, like ferns, do better in lower light conditions.
It's important to research the specific light requirements of the plants you have or want to get to ensure they get the right amount of light.
What are good home-made fertilizers for houseplants?
There are several homemade fertilizers that you can make for your houseplants using ingredients you may already have at home. Here are a few options:
- Compost tea: Steep compost in water for a few days to create a nutrient-rich tea that can be used to water your plants.
- Epsom salt: Dissolve 1-2 tablespoons of Epsom salt in a gallon of water and use it to water your plants. Epsom salt is rich in magnesium, which is an essential nutrient for plant growth.
- Coffee grounds: Add used coffee grounds to the soil around your plants. Coffee grounds are rich in nitrogen, which is essential for plant growth.
- Banana peel: Place a banana peel in a jar with water and let it steep for a few days. Use the banana water to fertilize your plants. Banana peels are rich in potassium, which is essential for plant growth.
- Eggshells: Crush eggshells into small pieces and add them to the soil around your plants. Eggshells are rich in calcium, which is essential for plant growth.
It's important to note that homemade fertilizers may not provide all of the necessary nutrients that your plants need, so it's a good idea to also use a commercial fertilizer or supplement with other organic materials as needed. Additionally, it's important to use homemade fertilizers in moderation to avoid over-fertilizing your plants.
How do I know if my plants are getting enough nutrients?
If your plants are not getting enough nutrients, they may show signs of stunted growth, yellowing or browning of leaves, and wilting or drooping.
To ensure that your plants are getting enough nutrients, you can fertilize them regularly with a balanced plant food.
You can also monitor the soil pH and adjust it as needed to ensure that your plants can take up the nutrients they need.
Additionally, you can use compost or other organic matter to enrich the soil and provide your plants with essential nutrients.
How do I prevent pests from infesting my plants?
Preventing pests from infesting your plants requires several strategies, including:
- Keep your plants healthy: Healthy plants are less susceptible to pest infestations, so make sure you're providing them with the right amount of light, water, and nutrients.
- Inspect plants regularly: Check your plants regularly for signs of pest infestation, such as yellow or brown spots, holes in the leaves, or webs.
- Quarantine new plants: Before bringing new plants into your home, inspect them thoroughly for pests and keep them in quarantine for a few weeks to make sure they're not carrying any pests.
- Practice good hygiene: Keep your plants and their surrounding area clean and free of debris to prevent pests from taking up residence.
- Use natural remedies: There are many natural remedies you can use to repel pests, such as neem oil, soap spray, or diatomaceous earth.
- Consider using pesticides only as a last resort: If you've tried natural remedies and your plants are still infested, you may need to use a pesticide. However, be sure to choose a product that's safe for indoor use and follow the instructions carefully.
How often should i repot my plant?
The frequency at which you should re-pot your plants depends on several factors, including the size of the pot, the size of the plant, and the rate of growth. Here are some general guidelines:
- Small plants: Small plants should be re-potted every 6-12 months, or whenever the roots start to outgrow the pot.
- Large plants: Larger plants should be re-potted every 1-2 years, or whenever the roots start to outgrow the pot.
- Fast-growing plants: Plants that grow quickly may need to be re-potted more frequently, as their roots can quickly outgrow the pot.
- Slow-growing plants: Plants that grow slowly may only need to be re-potted every few years.
When re-potting your plants, choose a pot that is one size larger than the current pot, with drainage holes at the bottom to prevent overwatering. Be sure to use a high-quality potting soil and water the plant thoroughly after re-potting.
What is the best season to repot my houseplants?
The best season to repot your houseplants is typically in the spring, just before the growing season begins. This allows the plant to have ample time to adjust to its new pot and soil before it starts growing actively.
However, if you notice that your plant is becoming root-bound or if it is showing signs of stress such as wilting or yellowing leaves, it may be necessary to repot it outside of the usual season.
It's important to note that some plants may have different preferences when it comes to repotting. For example, succulents and cacti are often repotted in the summer when they are actively growing, while orchids are often repotted in the fall after they have finished blooming. Be sure to research the specific needs of your plant before deciding when to repot it.
What is the ideal position for a houseplant?
The ideal position for a houseplant depends on the specific needs of the plant, but in general, most houseplants prefer bright, indirect light. This means placing them near a window that receives plenty of natural light, but not in direct sunlight, which can be too harsh for many plants.
It's important to note that some plants have specific light requirements. For example, some plants, such as succulents and cacti, prefer bright, direct light, while others, such as ferns, prefer lower light levels.
In addition to light, it's also important to consider other environmental factors such as temperature and humidity. Many plants prefer temperatures between 60-75°F (15-24°C), and some plants require higher humidity levels than others. Placing a tray of water near the plant or using a humidifier can help increase humidity levels.
Overall, the ideal position for a houseplant is one that meets the specific needs of the plant, including light, temperature, and humidity. It's important to research the specific requirements of your plant to ensure it is placed in the optimal position.
How do I care for my houseplants in autumn and winter?
As days get shorter and light levels drop, most houseplants slow their growth. They’ll need less water and no fertiliser, but benefit from a bit more light, slightly higher humidity, and clean leaves to keep pests at bay.
Read our full seasonal care guide here →
Why are my houseplants losing leaves in autumn or winter?
Shorter days mean less light, so many plants slow down or drop older leaves to save energy. It’s normal — and with the right care, they’ll stay healthy until spring.
Read how to support them →
Should I fertilise my houseplants during winter?
No — most plants aren’t actively growing in the darker months, so fertiliser can build up as salts and damage their roots. Wait until you see new growth in spring.
Read all our winter care tips →
How can I prevent pests on my plants in winter?
Slower growth and dry indoor air can make plants more vulnerable to pests. Keeping leaves clean, raising humidity, and checking regularly helps a lot.
See our 5 expert tips →
Which houseplants are best for air quality inside the home?
Several houseplants have been shown to be effective at improving indoor air quality by removing pollutants such as benzene, formaldehyde, and trichloroethylene. Here are a few examples:
- Spider plant (Chlorophytum comosum) - removes formaldehyde, xylene, and toluene
- Snake plant (Sansevieria trifasciata) - removes benzene, formaldehyde, trichloroethylene, and xylene
- Peace lily (Spathiphyllum sp.) - removes formaldehyde, benzene, and trichloroethylene
- Boston fern (Nephrolepis exaltata) - removes formaldehyde and xylene
- Areca palm (Dypsis lutescens) - removes formaldehyde, benzene, and trichloroethylene
It's important to note that while these plants can help improve indoor air quality, they are not a substitute for proper ventilation and other measures to reduce indoor air pollutants. It's also important to choose plants that are safe for pets if you have animals in your home.
What are air roots and how should i deal with them?
Air roots are roots that grow above the soil level and do not have access to the moisture and nutrients found in the soil. They are common in some plants, such as orchids and bromeliads. Here are some things you can do with air roots:
- Leave them alone: Air roots are a natural part of the plant's growth and development, and in many cases, they do not need any special attention. If the air roots are healthy and not causing any issues, you can leave them as they are.
- Mist them: Since air roots do not have access to the moisture found in the soil, you can mist them with water to provide them with the moisture they need. Use a spray bottle to mist the air roots once or twice a week.
- Wrap them in sphagnum moss: Sphagnum moss is a type of moss that retains moisture well. You can wrap the air roots in sphagnum moss and mist it regularly to keep the air roots moist.
- Tuck them into the soil: If the air roots are long enough, you can tuck them into the soil of the plant's pot. This will allow the roots to absorb moisture and nutrients from the soil.
- Trim them: If the air roots are unhealthy or damaged, you can trim them off using clean, sharp scissors or pruning shears. However, you should only do this if the air roots are causing issues or if the plant is outgrowing its pot.
how can i create a green indoor oasis without money?
Creating a green indoor oasis without spending any money is possible by using items you already have at home.
One way is to propagate your existing plants and grow new ones from cuttings.
You can also repurpose old containers like jars, cans, and bottles to use as planters.
Additionally, you can trade plant cuttings with friends or neighbors to expand your collection without spending money.
Another option is to look for free plants on classified ads or local plant swap events.
Finally, you can take advantage of natural light and use your windowsill to create a mini indoor garden.
How can I propagate my houseplants?
Propagation is the process of creating new plants from an existing one. Here are some common methods for propagating houseplants:
- Stem cutting: Cut a stem from the parent plant, making sure it has at least one node (the point where leaves grow from the stem). Dip the cut end in rooting hormone, then plant it in a pot with moist potting soil. Keep the soil moist and in a warm, bright location until the cutting has rooted.
- Leaf cutting: Cut a leaf from the parent plant, making sure it has a short stem attached. Plant the stem in moist potting soil and cover with a plastic bag to create a humid environment. Keep the soil moist and in a warm, bright location until the leaf cutting has rooted and developed a new plant.
- Division: Some plants, such as spider plants and snake plants, can be divided into smaller plants. Carefully remove the parent plant from its pot and separate the smaller plants from the root ball. Repot the smaller plants in their own pots with fresh potting soil.
- Air layering: This method is best for plants with woody stems, such as rubber plants and fiddle leaf figs. Make a small cut in the stem and wrap it with moist sphagnum moss. Cover the moss with plastic wrap and secure it in place. Roots will eventually grow from the moss, at which point the stem can be cut from the parent plant and potted on its own.
Propagation can be a fun and rewarding way to expand your collection of houseplants, and it's also a sustainable way to grow new plants without purchasing them.
What houseplants should i NOT get if i have pets?
If you have pets, it's important to be aware that some houseplants can be toxic to cats, dogs, and other animals if ingested. Here are a few examples of houseplants to avoid if you have pets:
- Sago palm (Cycas revoluta) - highly toxic to dogs, cats, and horses
- Dieffenbachia (Dieffenbachia spp.) - contains calcium oxalate crystals that can cause oral irritation and swelling if ingested
- Peace lily (Spathiphyllum spp.) - contains calcium oxalate crystals that can cause oral irritation and swelling if ingested
- Philodendron (Philodendron spp.) - contains calcium oxalate crystals that can cause oral irritation and swelling if ingested
- Pothos (Epipremnum aureum) - contains calcium oxalate crystals that can cause oral irritation and swelling if ingested
This is not an exhaustive list, and it's important to research the toxicity of any houseplants you are considering before bringing them into your home. If you have pets, it's also a good idea to place houseplants out of reach, or to use pet-safe barriers to prevent animals from accessing them.
How can I recognize common houseplant pests and get rid them?
There are several common houseplant pests that can cause problems for indoor plants. Here are six of the most well-known, along with tips for recognizing them and getting rid of them:
- Aphids: Aphids are small, soft-bodied insects that can range in color from green to black. They feed on plant sap, and can cause yellowing, wilting, and stunted growth. To get rid of aphids, you can try spraying your plants with a mixture of water and dish soap, or using an insecticidal soap or neem oil.
- Spider mites: Spider mites are tiny, spider-like pests that can be difficult to see without a magnifying glass. They can cause yellowing, mottling, and webbing on leaves. To get rid of spider mites, you can try washing your plants with a strong jet of water, or using an insecticidal soap or neem oil.
- Mealybugs: Mealybugs are small, white, cottony-looking insects that feed on plant sap. They can cause yellowing, wilting, and distorted growth. To get rid of mealybugs, you can try using a cotton swab dipped in rubbing alcohol to wipe them off, or using an insecticidal soap or neem oil.
- Scale insects: Scale insects are small, flat, oval-shaped pests that can range in color from brown to black. They feed on plant sap, and can cause yellowing, wilting, and leaf drop. To get rid of scale insects, you can try scraping them off with a cotton swab or toothbrush dipped in rubbing alcohol, or using an insecticidal soap or neem oil.
- Whiteflies: Whiteflies are small, white, moth-like insects that feed on plant sap. They can cause yellowing, wilting, and stunted growth. To get rid of whiteflies, you can try spraying your plants with a mixture of water and dish soap, or using an insecticidal soap or neem oil.
- Fungus gnats: Fungus gnats are small, dark-colored flies that feed on decaying organic matter. They can lay their eggs in soil, and the larvae can feed on plant roots. To get rid of fungus gnats, you can try letting your soil dry out completely between waterings, or using a biological control such as beneficial nematodes or predatory mites.
It's important to note that different pests may require different treatments, and it's always a good idea to identify the pest before taking action. In addition to these common pests, there are many other pests that can affect houseplants, so it's important to monitor your plants regularly and take action if you notice any signs of infestation.
Which houseplants are edible?
There are several houseplants that are edible and can be a great addition to your indoor garden:
- Aloe vera - the gel inside the leaves can be used to soothe burns and skin irritations
- Basil - a popular herb used in many culinary dishes
- Mint - a refreshing herb that can be used to make tea, garnish desserts, and add flavor to dishes
- Chives - a member of the onion family that can be used as a garnish or in cooking
- Lemon balm - a lemon-scented herb that can be used in teas and salads
- Oregano - a flavorful herb used in Mediterranean cuisine
- Rosemary - an herb with a distinctive pine-like flavor that is often used in roasted dishes and soups
- Thyme - a fragrant herb used in Mediterranean and Middle Eastern cuisine
When it comes to edible houseplants, it's important to ensure that you are using organic soil and avoiding any pesticides or fertilizers that could be harmful if ingested. Additionally, make sure to research the specific growing requirements for each plant to ensure that it is getting the right amount of light, water, and nutrients.
What are the best plants for a north-facing window?
North-facing windows receive the least amount of direct sunlight and can be challenging for plants that require a lot of light. However, there are still many houseplants that can thrive in low-light conditions. Here are some of the best plants for a north-facing window:
- Pothos - a low-maintenance plant that can tolerate low light levels and doesn't require much watering.
- Philodendron - a versatile plant that can grow in both low and bright light conditions, making it a good option for a north-facing window.
- ZZ plant - a hardy plant that can survive in low light and infrequent watering.
- Chinese evergreen - a low-maintenance plant that can tolerate low light and dry air.
- Ferns - many types of ferns, such as the Boston fern and the maidenhair fern, can grow well in low light.
- Peace lily - a beautiful plant that can thrive in low light and can also help purify the air.
- English ivy - a trailing plant that can grow well in low light and can help purify the air.
Remember, even low-light plants still need some natural light to thrive, so try to keep them as close to the window as possible. Additionally, make sure not to overwater your plants in low light conditions, as they may not be able to use all of the moisture in the soil.
What are the best plants for a south-facing window?
South facing windows receive the most direct sunlight throughout the day, making it an ideal location for plants that require lots of light. Here are some of the best houseplants for a south facing window:
- Cacti and succulents - these plants thrive in bright light and do not require much watering.
- Snake plant - a low maintenance plant that can tolerate a variety of light levels, including bright, direct sunlight.
- Spider plant - a resilient plant that can tolerate direct sunlight, but also does well in lower light levels.
- Jade plant - a succulent that thrives in direct sunlight and prefers dry soil.
- Aloe vera - a plant that requires lots of bright light and can be used for medicinal purposes.
- Rubber plant - a hardy plant that can withstand direct sunlight and grows well in warm, humid environments.
- Ficus - a popular indoor tree that thrives in bright, indirect sunlight but can tolerate some direct sunlight.
Remember, even plants that love direct sunlight can still suffer from too much heat, so make sure to monitor the temperature and humidity levels around your plants. Additionally, be sure to water your plants as needed to prevent the soil from drying out too much in the hot sun.
What are the best plants for an east- or west-facing window?
East- and west-facing windows receive moderate to bright indirect light, making them great for a wide variety of plants. Here are some of the best plants for east- or west-facing windows:
- Spider plant - a low-maintenance plant that can tolerate a range of light conditions and can help purify the air.
- Rubber plant - a beautiful and hardy plant that can grow well in moderate light and prefers to dry out between waterings.
- African violet - a colorful and compact plant that can thrive in the bright but indirect light of an east- or west-facing window.
- Ficus - a versatile plant that can grow in moderate to bright light and prefers to dry out between waterings.
- Jade plant - a succulent that prefers bright, indirect light and infrequent watering.
- Croton - a colorful plant that can thrive in bright light and requires moderate to high humidity.
- Philodendron - a popular plant that can grow in moderate to bright light and prefers to dry out between waterings.
Remember to rotate your plants every few weeks to ensure that all sides of the plant receive equal amounts of light. And be mindful of the specific light and water requirements of each plant to ensure it thrives in your specific conditions.
Which plants should I have in my bedroom?
There are many plants that can thrive in a bedroom environment and also offer potential health benefits, such as improving air quality and reducing stress. Here are some options to consider:
- Snake Plant (Sansevieria): This plant is known for its ability to purify the air by removing toxins and emitting oxygen during the night, making it a great choice for the bedroom.
- Aloe Vera: Aloe Vera is a low-maintenance plant that is easy to care for and can improve the air quality of your bedroom.
- Lavender: Lavender has a calming effect and can help to reduce stress and anxiety levels, making it a great plant to keep in the bedroom.
- Golden Pothos: This plant is another great air purifier that can thrive in low-light environments, making it a good choice for a bedroom.
- English Ivy: English Ivy has been shown to improve air quality by removing toxins and mold spores from the air, making it a good option for people with allergies or respiratory issues.
- Spider Plant: Spider plants are known for their air-purifying abilities and can help to remove harmful toxins from the air.
Overall, it's important to choose a plant that fits your lifestyle and preferences, as well as your bedroom environment, to ensure the best chances of success.
Which productivity-boosting plants should i add to my home office?
There are several plants that are ideal for a home office, as they can help purify the air and create a more calming and productive work environment. Here are some options:
- Snake Plant (Sansevieria): This hardy plant is great for low light situations and is known for its air-purifying qualities.
- ZZ Plant (Zamioculcas zamiifolia): The ZZ plant can tolerate low light and irregular watering, making it a low-maintenance choice for a home office.
- Pothos (Epipremnum aureum): This trailing plant can thrive in low light and is also effective at removing toxins from the air.
- Peace Lily (Spathiphyllum): With its attractive white flowers and ability to tolerate low light, the peace lily is a popular choice for indoor spaces.
- Spider Plant (Chlorophytum comosum): This easy-to-grow plant is known for its air-purifying qualities and can add a touch of green to any home office.
- Aloe Vera: This succulent plant is not only attractive, but its leaves contain a gel that can be used to treat minor cuts and burns.
- Rubber Plant (Ficus elastica): The rubber plant can tolerate low light and infrequent watering, making it a great choice for a home office.
Overall, it's important to choose plants that fit the lighting conditions of your home office and require minimal care to ensure they thrive in the space.
Which plants increase humidity levels in the home?
Plants that are known to increase humidity levels in the home include:
- Boston Fern: This plant is known for its ability to increase humidity levels in the home, making it an ideal choice for drier environments.
- Spider Plant: Spider plants are easy to care for and are known to remove pollutants from the air. They also help to increase humidity levels in the home.
- Peace Lily: This beautiful plant is known for its air-purifying qualities, as well as its ability to increase humidity levels in the home.
- English Ivy: English Ivy is a versatile plant that can be grown in a variety of conditions. It is also known for its ability to increase humidity levels in the home.
- Areca Palm: This tropical plant is not only beautiful but is also known to increase humidity levels in the home.
These plants can help to maintain a healthy level of humidity in the home, which can be beneficial for the health of both people and other plants.
which plants like to have their leaves misted?
Plants that are native to humid environments or tropical rainforests generally enjoy having their leaves misted as it mimics their natural environment.
Some examples of plants that like to have their leaves misted include ferns, orchids, prayer plants, and Calathea.
However, it's important to note that misting is not a substitute for proper watering and humidity levels, and over-misting can lead to problems such as fungal growth or waterlogged soil.
What office plants are easiest to care for?
There are several low-maintenance plants that are perfect for an office setting, as they can improve air quality and add a touch of greenery to the space. Some of the best office plants include:
- Snake Plant: Also known as mother-in-law's tongue, this plant is very low maintenance and can survive in a variety of lighting conditions.
- Pothos: A trailing vine that is easy to care for and can grow in low light.
- ZZ Plant: This plant is very drought-tolerant and can thrive in low light conditions.
- Peace Lily: This plant has beautiful white flowers and can improve air quality by removing toxins.
- Spider Plant: A great option for low light conditions, the spider plant is known for its air-purifying abilities.
- Rubber Plant: A hardy plant that can tolerate low light and infrequent watering.
- Chinese Evergreen: A beautiful plant with variegated leaves that can grow in low to medium light conditions.
These plants are not only great for the office but also for any indoor setting.
what is companion planting?
Companion planting is the practice of growing different plant species in close proximity to one another to enhance growth, repel pests, and promote overall health.
In the case of houseplants, companion planting involves growing plants together that have complementary needs and benefits.
Some examples of companion plants for houseplants include:
- Spider plants and English ivy, which are both known for their air-purifying qualities and can help keep the air clean and healthy in your home.
- Peperomia and prayer plants, which have similar watering and light requirements and can create a beautiful, contrasting display when grown together.
- Pothos and ferns, which both thrive in low to medium light conditions and can help add a touch of green to any room.
- Aloe vera and succulents, which are both easy-care plants that require minimal watering and can help add a touch of texture and interest to your space.
When companion planting houseplants, it's important to consider the needs of each plant and ensure they are compatible. This can include factors such as light requirements, watering needs, and the presence of any pests or diseases. By carefully selecting companion plants and growing them together, you can help create a healthy and thriving indoor garden.
How can i get started with companion planting?
To get started with companion planting for your houseplants, here are some steps you can follow:
- Identify your houseplants: Take an inventory of the houseplants you currently have and their individual needs. This will help you determine which plants are compatible with each other.
- Choose companion plants: Research companion plants that will thrive with your houseplants. Look for plants that have similar care requirements, such as similar light and water needs.
- Determine placement: Decide where to place your companion plants in relation to your houseplants. Some plants may do well in the same pot, while others may need to be placed nearby.
- Consider pest control: Some companion plants can help repel pests or attract beneficial insects that will help control pests. Consider adding plants such as marigolds or lavender to your houseplant collection.
- Monitor your plants: Keep an eye on your plants and make note of any changes in their growth or health. If you notice any negative effects from the companion plants, adjust their placement or remove them altogether.
Remember that companion planting is not an exact science and may require some trial and error to find the right combinations for your houseplants.
what are the benefits of companion planting?
Companion planting houseplants can have several benefits, such as:
1. Pest control: Certain plants can naturally repel pests or attract beneficial insects that can help control pests.
2. Improved growth: Companion planting can help provide better growing conditions, such as increased moisture retention, improved soil quality, and more nutrients for plants.
3. Aesthetic appeal: Companion planting can also be used to create attractive and visually appealing displays of different plants that complement each other in terms of color, texture, and form.
4. Disease prevention: Some companion plants can help prevent the spread of diseases by attracting beneficial microbes and fungi that can protect plants from harmful pathogens.
Overall, companion planting can be an effective and sustainable way to promote healthy plant growth and create a thriving ecosystem in your indoor space.